
Networking & Remote Access
Configure remote access, LAN connectivity, SSL/HTTPS, and port management.
Network Overview
Remote Access Configuration
To access Minepanel from outside your local network:
1. Update Environment Variables
Edit your docker-compose.yml:
environment:
  # Backend - Controls CORS
  - FRONTEND_URL=http://your-server-ip:3000

  # Frontend - API endpoints
- NEXT_PUBLIC_BACKEND_URL=http://your-server-ip:80912. Using a Domain Name
If you have a domain:
environment:
  # Backend
  - FRONTEND_URL=https://minepanel.yourdomain.com

  # Frontend
- NEXT_PUBLIC_BACKEND_URL=https://api.yourdomain.com3. Restart Services
docker compose restartSecurity
- Always use HTTPS for production deployments
- See SSL/HTTPS section below for setup
- Make sure your firewall allows the required ports
- Don't expose ports publicly without proper authentication
Public IP Configuration
When deploying MinePanel on a VPS or remote server, the auto-detected public IP (via ipify.org) may show the client's IP instead of the server's IP. To fix this, set HOST_PUBLIC_IP to your server's public IP or domain.
Configuration
Add to your docker-compose.yml:
services:
  minepanel:
    environment:
      # ... other variables
- HOST_PUBLIC_IP=123.45.67.89 # Or use a domain: play.example.comOr in your .env file:
HOST_PUBLIC_IP=play.example.comTIP
If HOST_PUBLIC_IP is not set, MinePanel falls back to client-side IP detection (ipify.org). This works for local deployments but shows incorrect IPs when accessing remotely.
LAN Network Configuration
When you create a Minecraft server, Minepanel automatically shows the connection information to share with players. By default, it shows your public IP (configured via HOST_PUBLIC_IP or auto-detected via ipify.org). However, if you want players on your local network (LAN) to see your local IP address, you need to configure it manually.
Why Configure LAN IP?
- Better performance: Players on your local network will connect directly without going through your router
- No port forwarding needed: For LAN players, you don't need to configure port forwarding
- Both options: The panel will show both public IP (for internet players) and LAN IP (for local players)
How to Get Your LAN IP
On macOS:
ipconfig getifaddr en0
# Example output: 192.168.3.208On Linux:
hostname -I | awk '{print $1}'
# Example output: 192.168.1.100On Windows (PowerShell):
(Get-NetIPAddress -AddressFamily IPv4 -InterfaceAlias "Ethernet").IPAddress
# Example output: 192.168.1.50TIP
Your LAN IP typically starts with 192.168.x.x or 10.x.x.x
Configuration
Add the HOST_LAN_IP variable to your docker-compose.yml:
services:
  minepanel:
    environment:
      # ... other variables
- HOST_LAN_IP=192.168.3.208 # Replace with your actual LAN IPOr in your .env file:
HOST_LAN_IP=192.168.3.208Restart Services
docker compose down
docker compose up -dHow It Works
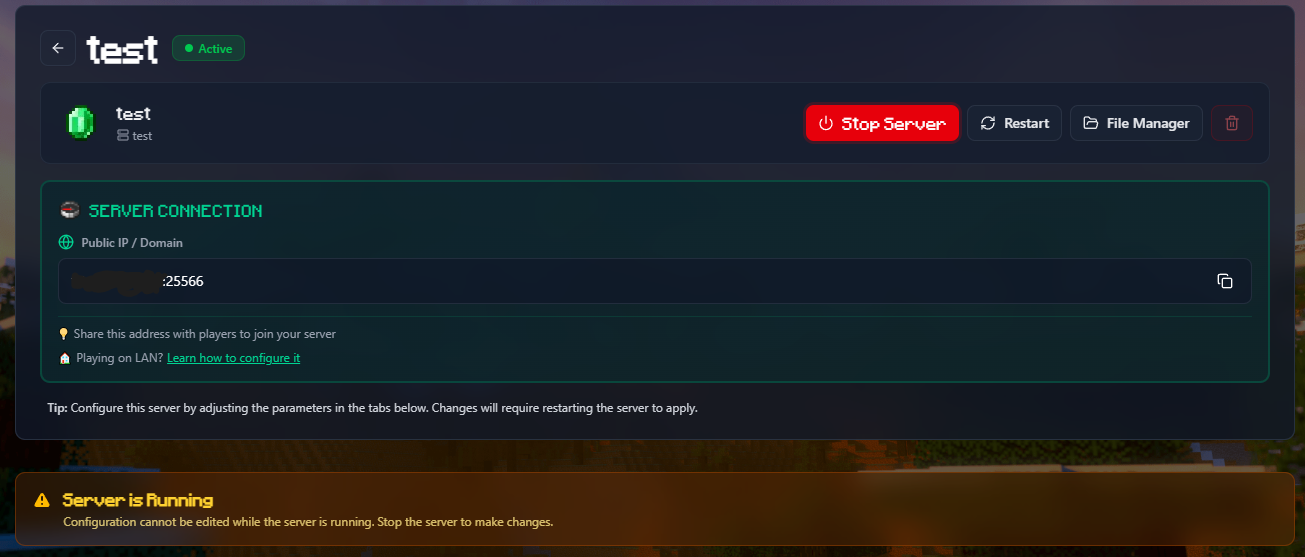
When a Minecraft server is running, the panel will show a Server Connection section with:
- Public IP/Domain:
203.0.113.50:25565(for external players) - LAN IP:
192.168.3.208:25565(for local network players)
Both addresses are easily copyable with one click.
INFO
If you don't configure HOST_LAN_IP, only the public IP will be shown. This is fine if all your players are connecting from the internet.
Port Configuration
Default Ports
| Service | Port | Description |
|---|---|---|
| Frontend | 3000 | Web interface |
| Backend | 8091 | API server |
| Minecraft Servers | 25565+ | Game servers |
Changing Ports
Edit your .env file or docker-compose.yml:
BACKEND_PORT=8091
FRONTEND_PORT=3000Port Conflicts
If a port is already in use:
# Check what's using the port
sudo lsof -i :3000

# Change to a different port
FRONTEND_PORT=3001Firewall Configuration
For remote access, open these ports:
# UFW (Ubuntu/Debian)
sudo ufw allow 3000/tcp   # Frontend
sudo ufw allow 8091/tcp   # Backend
sudo ufw allow 25565/tcp  # Minecraft (default)

# firewalld (CentOS/RHEL)
sudo firewall-cmd --permanent --add-port=3000/tcp
sudo firewall-cmd --permanent --add-port=8091/tcp
sudo firewall-cmd --permanent --add-port=8080/tcp
sudo firewall-cmd --permanent --add-port=25565/tcp
sudo firewall-cmd --reloadSSL/HTTPS
For production deployments, use HTTPS with a reverse proxy.
Using Nginx
- Install Nginx and Certbot:
sudo apt update
sudo apt install nginx certbot python3-certbot-nginx- Create Nginx config:
# /etc/nginx/sites-available/minepanel
server {
    listen 80;
    server_name minepanel.yourdomain.com;

    location / {
        proxy_pass http://localhost:3000;
        proxy_http_version 1.1;
        proxy_set_header Upgrade $http_upgrade;
        proxy_set_header Connection 'upgrade';
        proxy_set_header Host $host;
        proxy_cache_bypass $http_upgrade;
    }

    location /api {
        proxy_pass http://localhost:8091;
        proxy_http_version 1.1;
        proxy_set_header Host $host;
    }
}- Enable and get SSL:
sudo ln -s /etc/nginx/sites-available/minepanel /etc/nginx/sites-enabled/
sudo nginx -t
sudo systemctl reload nginx
sudo certbot --nginx -d minepanel.yourdomain.com- Update environment variables:
environment:
  - FRONTEND_URL=https://minepanel.yourdomain.com
- NEXT_PUBLIC_BACKEND_URL=https://minepanel.yourdomain.com/apiUsing Caddy
Caddy automatically handles SSL certificates:
# Caddyfile
minepanel.yourdomain.com {
    reverse_proxy localhost:3000

    handle /api/* {
        reverse_proxy localhost:8091
    }
}caddy startBehind a Reverse Proxy
Update all three critical variables:
environment:
  # Backend - CRITICAL for CORS
  - FRONTEND_URL=https://your-domain.com

  # Frontend - API endpoints
- NEXT_PUBLIC_BACKEND_URL=https://api.your-domain.comSubdirectory Routing
If you want to host Minepanel on a subdirectory instead of a subdomain (e.g., mydomain.com/minepanel instead of minepanel.mydomain.com), you need to build the images yourself.
Build-time Configuration
The frontend NEXT_PUBLIC_BASE_PATH must be set at build time, not runtime. This is a Next.js limitation - the basePath affects how assets are generated during compilation.
Using docker-compose.example.yml (Recommended)
The easiest way is to use docker-compose.example.yml which builds both frontend and backend:
- Clone the repository
- Edit
docker-compose.example.yml:
frontend:
  build:
    context: ./frontend
    args:
      - NEXT_PUBLIC_BASE_PATH=/minepanel  # Your subdirectory
  environment:
    - NEXT_PUBLIC_BACKEND_URL=https://mydomain.com/api

backend:
  environment:
    - BASE_PATH=/api
- FRONTEND_URL=https://mydomain.com/minepanel- Build and run:
docker compose -f docker-compose.example.yml up --build -dManual Build
Alternatively, build the frontend image manually:
docker build --build-arg NEXT_PUBLIC_BASE_PATH=/minepanel -t minepanel-frontend ./frontendNginx Example (Subdirectory)
# /etc/nginx/sites-available/mysite
server {
    listen 80;
    server_name mydomain.com;

    # Frontend on /minepanel
    location /minepanel {
        proxy_pass http://localhost:3000;
        proxy_http_version 1.1;
        proxy_set_header Upgrade $http_upgrade;
        proxy_set_header Connection 'upgrade';
        proxy_set_header Host $host;
        proxy_cache_bypass $http_upgrade;
    }

    # Backend API on /api
    location /api {
        proxy_pass http://localhost:8091;
        proxy_http_version 1.1;
        proxy_set_header Host $host;
    }
}Caddy Example (Subdirectory)
mydomain.com {
    handle_path /minepanel/* {
        reverse_proxy localhost:3000
    }

    handle_path /api/* {
        reverse_proxy localhost:8091
    }
}TIP
When using subdirectory routing, make sure your NEXT_PUBLIC_BACKEND_URL includes the full path including the BASE_PATH prefix.
Custom Network
If you need a custom Docker network:
networks:
  minepanel:
    driver: bridge
    ipam:
      config:
        - subnet: 172.20.0.0/16

services:
  minepanel:
    networks:
- minepanelTroubleshooting Network Issues
Can't access from remote
- Check
FRONTEND_URLmatches the URL you're using - Verify firewall ports are open
- Check router port forwarding (if applicable)
- Restart after changing network variables
CORS Errors
The FRONTEND_URL variable controls CORS. It must match exactly how you access the frontend:
- Local:
FRONTEND_URL=http://localhost:3000 - Remote IP:
FRONTEND_URL=http://192.168.1.100:3000 - Domain:
FRONTEND_URL=https://minepanel.yourdomain.com
Always restart after changing: docker compose restart
Connection Refused
- Check Docker is running:
docker ps - Check logs:
docker compose logs - Verify ports aren't conflicting:
sudo lsof -i :3000
Next Steps
- Configure Administration Settings
- Set up Server Types
- Review Troubleshooting Guide